
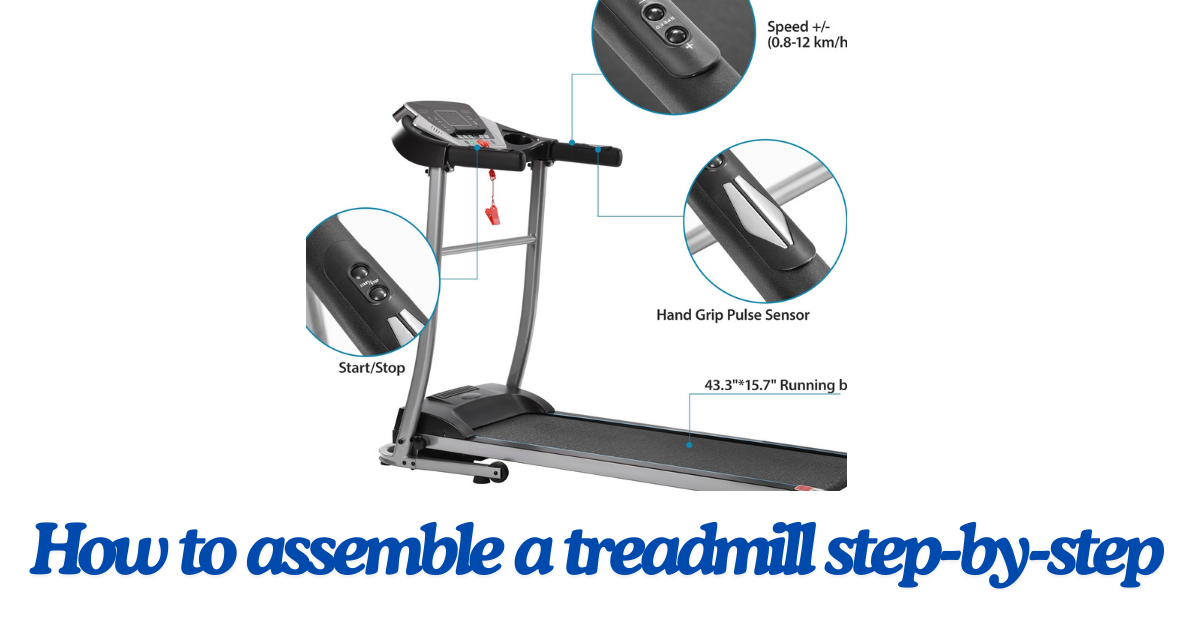
How to assemble a treadmill step-by-step
The process of assembling your treadmill can be both exciting and overwhelming. This guide provides you with professional counsel and details that will help you put it together without any difficulties.
I. Introduction to Treadmill Assembly
Starting up on Treadmill Assembly
Before embarking on the installation, make sure you have identified the right spot for your treadmill. It is better to choose a free space that has a lot of room for movement. By planning and knowing how long your treadmill will last, it will be easy to assemble it successfully.
Choosing the Right Location
Choose a place with enough space as well as proper ventilation that would suit your treadmill. Avoid places with high humidity or direct sunlight because these environmental conditions can affect their performance and lifespan.
Plan for Success
Before starting the assembly process, take time to read carefully through the manual instructions so as not to miss anything. Preplanning by going through all the mounting stages makes things easier during installation, thereby minimizing the chances of mistakes.
Understanding Treadmill Longevity
Treadmills are built with durability in mind; they can last many years if they are properly cared for and maintained. Understanding what elements contribute to the life span of a treadmill will enable one to make the right choices during assembly as well as throughout the equipment’s existence.
II. Pre-Assembly Preparations
Clearing Your WorkSpace
Make sure that you have set up an area that is clean and orderly so that you can assemble your fitness machine comfortably there. Getting rid of anything that may obstruct movement in this area ensures an accident-free setup period.
Read the Instruction Manual Carefully
These guidelines at hand offer useful recommendations on how one should get started, listing the components needed to do so.
Plan for Success
Being prepared ahead of time before assembly starts saves time and frustration during assembly. It helps to have everything ready when starting, rather than searching for them in the process.
III. Assembling the Frame
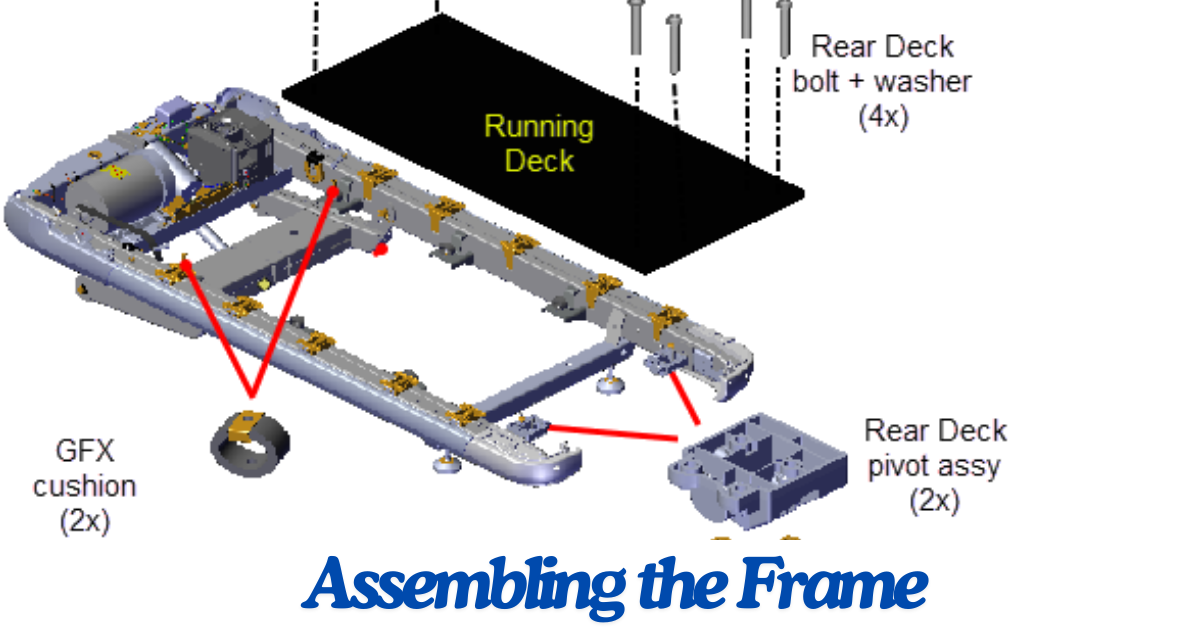
Fixing the Base
The base is attached to the treadmill with guidance from the manufacturer’s manual. If you are putting together a NordicTrack Commercial 1750, consult the sample steps given for details about how to assemble it.
Mount Handlebars and Rails
Secure tightly all handlebars and rails as defined by the producer. This makes sure that there will be no movement or shaking during application.
IV. Installing the Running Belt

Setting Up Treadmill Deck
Ensure correct alignment of the treadmill deck with the drive motor when placing this component on top of the base. Avoid any obstructions or dirt that can hamper smooth belt running.
Connecting Drive Belt
Follow the provided instructions to fasten the drive belt onto the motor as well as the treadmill deck. It should not slip and slide while moving but rather maintain its place at all times.
Adjusting Tension
After setting up, adjust the tension of the running belt according to your preferences using the provided settings. The proper tension of a belt reduces wear and tear on different parts of a treadmill, helping it work better.
V. Adding Console and Electronics
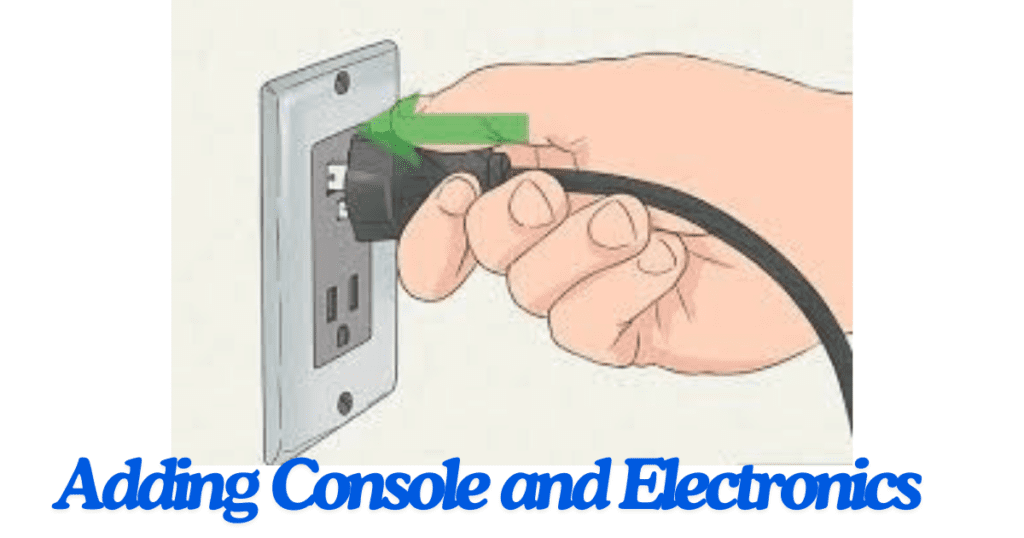
Attaching Console
Attach the console to a designated part of the treadmill frame, ensuring that all wires are properly connected and held in place for safety purposes against damage when installing sensitive electronic components.
Connecting Control Panel
Connect the control panel to its specified location within the treadmill frame such that it is easily accessible as well as displayers being visible in front of the user’s eyes. Check if everything is plugged correctly so that they don’t malfunction.
Wiring
Be certain to connect the wiring harnesses as indicated in the diagram or instructions provided. Avoid rushing; ensure that every connection is tight to prevent any electrical malfunctioning during exercise.
VI. Final Checks and Calibration
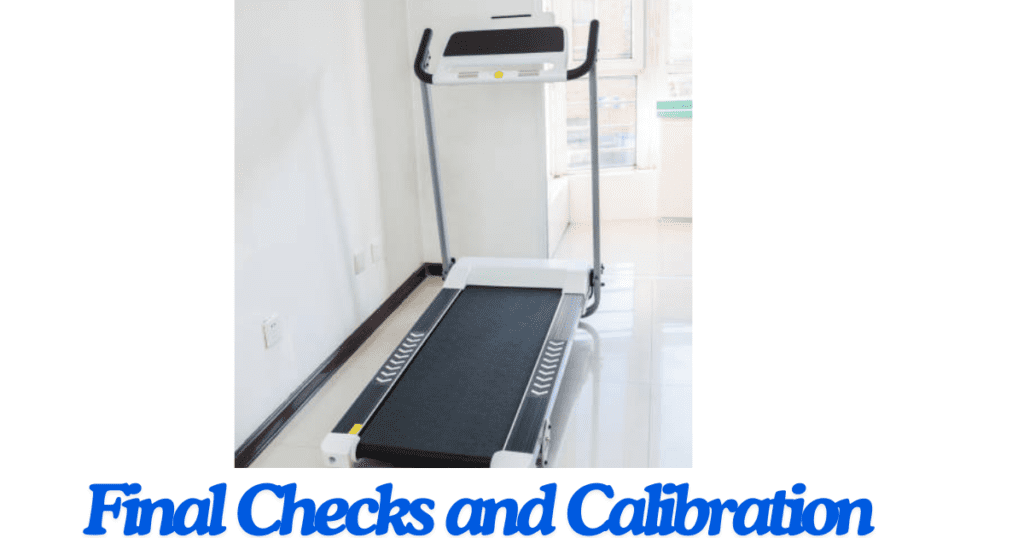
Loose Fasteners Inspection
Before switching on the treadmill, all fasteners and components must be carefully examined. In case of loose bolts or screws, tighten them well for safety purposes.
Calibration
Follow the manufacturer’s instructions on how to calibrate the treadmill for optimal performance. This process ensures accurate speed and incline readings, allowing you to have accurate workout data as you exercise.
Belt Tension Testing
When the assembly is complete, the belt is tensioned properly. A well-tightened belt will make running smoother and more comfortable.
you can read this: https://drreactivate.com/what-to-know-about-muscle-strain-8-points/
VII. Conclusion
Congratulations! Your treadmill has been successfully assembled and now you are ready to begin your journey towards fitness. With proper care and maintenance, your treadmill can give you unlimited hours of enjoyable workouts that can help you achieve your fitness goals
FAQs
Q1: What tools will be needed in assembling a home treadmill?
Typically, you’ll need basic tools such as a screwdriver, adjustable wrench, Allen wrench (usually provided with the treadmill), and possibly a rubber mallet for tapping parts into place.
Q2: How long does it usually take to put together a treadmill?
The duration can depend on the model and your skill level but normally it takes about one to three hours to assemble a treadmill.
Q3: Should I build my treadmill alone or is there someone else who can help me?
It is advisable to have an assistant, particularly when dealing with heavy components and aligning pieces during assembly. This would make the process easier and safer.
Q4: Do I need to read through the instruction manual before installation?
Yes, it is highly recommended that you go through the instruction manual provided by the manufacturer carefully; this helps in understanding how your machine fits together and avoids any errors.
Q5: How do I start assembling my new treadmill?
Begin by incorporating base frame for your treadmill using instructions from its manual on how front stabilizers are attached at rear ones after which uprights or side rails are linked up.
Q6: How do I install the running board for my equipment’s belt?
Carefully lift the running board onto deck so that it remains well centered while being mounted properly then bolt or screw its sides down until tightened as per guide book provided with these devices thus adjusting tension levels recommended by manufacturer.
Q7: Can I test the treadmill before completing the assembly process?
It is not recommended to test your treadmill until you have finished assembling it. After following all the instructions in the manual and assembled all parts, one can then connect and power on their machine for any necessary setup or calibration steps prior to its use.
Q8: What do I do if I meet any difficulties during assembly?
In case of any difficulty or inquiries during installation process, refer back to user guide first. There are a number of common issues that are addressed by this instrument, while those that persist may call for assistance from customer care at makers’ company which can provide guidance as well as trouble shooting tips.